Learn how to use the Job Safety Analysis feature within the SetConnect Web Portal
How to create a Job Safety Analysis Account Template
To create a Job Safety Analysis go to the Templates Tab and click on Job Safety Analysis Templates

Then click on +Add Job Safety Analysis
You will be given three options:
Create New – opens a new blank template
Select from Global Templates – PLEASE IGNORE – FEATURE STILL TO COME
Copy all Active Templates – Will duplicate your current active templates
Once you have clicked on Create New the below dialog box will appear.
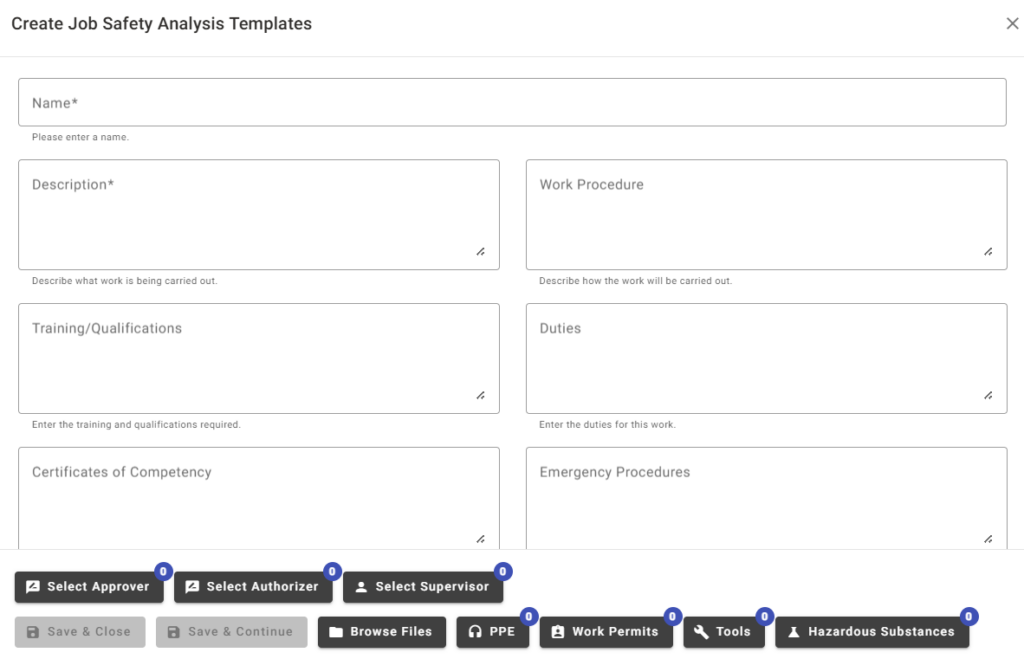
Complete the fields as follows:
Name – enter the template name
Description – enter a description of the Job Safety Analysis
Work Procedure – enter the work procedure for this Job Safety Analysis
Training/Qualifications – enter the qualifications required for this Job Safety Analysis
Duties – enter the duties to be undertaken for this Job Safety Analysis
Certificates of Competency – enter the certificates required for this Job Safety Analysis
Code of Practice – enter the Code of Practice for this Job Safety Analysis
Maintenance checks – enter the maintenance checks required for this Job Safety Analysis
Safety Practice – enter the safety practices for this Job Safety Analysis
PPE Other – PPE can either be selected from the PPE tab at the bottom of the dialog box or entered manually
Work Permits Other – Work Permits can either be selected from the Work Permits tab at the bottom of the dialog box or entered manually
Tools Other – Tools can either be selected from the Tools tab at the bottom of the dialog box or entered manually
TOOLS – a list of tools can be managed through the Tools Tab on the main menu
PPE & WORK PERMITS – will be managed through SetConnect
HAZARDOUS SUBSTANCES – these can be selected from your account level hazardous substance register.
TOOLS – a list of tools can be managed through the Tools Tab on the main menu
PPE & WORK PERMITS – will be managed through SetConnect. Please contact our support team if you would like to add a new option.
Separate each new item for work procedure, qualifications, duties, training, certificates, Code of Practice, maintenance checks, safety practice, PPE, Work Permits, Tools by entering each item on a new line
Once you have filled these fields out you can then select from your list of Cast/Crew who will be the Approver (person highest ranked in the organisation, i.e. CEO, General Manager), Authorizer (person in charge of the division) & Supervisor (person who will be supervising the people carrying out the task) for this Job Safety Analysis.

You can also then add any relevant files by hitting the Browse Files option.

Once all of this has been finalised you can click Save & Continue or Save & Close.
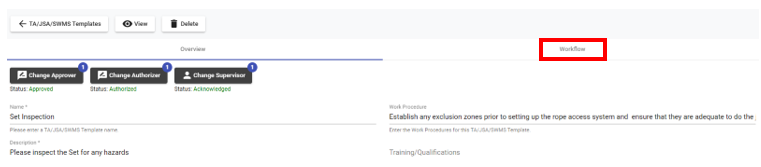
Once saved the Job Safety Analysis will display like the below example. You can now click on the Workflow Tab to enter the steps and associated hazards/risks
If you have set yourself as the Approver, Authorizer or Supervisor these will display as Required.
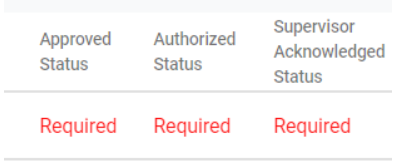
If you have set somebody else as any of these potions then this will be Pending.
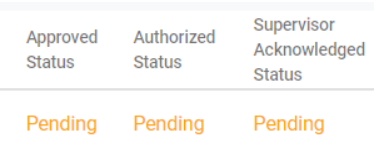
Once the Job Safety Analysis has been approved, authorized and acknowledged these fields will display as follows:
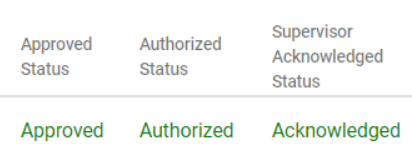
Please note that you can have different people for each field so this may be a mixture of these three statuses when you check this Job Safety Analysis in the future.
You can then View the Job Safety Analysis which bring up all of the fields in order as well as show relevant dates related to this template.
Scroll down the document to see all fields. Also please note that any changes to the template or workflows will also be visible in this document
Once the template has been created it will show in your Account Level list – go to the Templates tab and click on Job Safety Analysis. From here you can Edit, View, Clone or Archive the template.
How to add an Account Template to a production/location
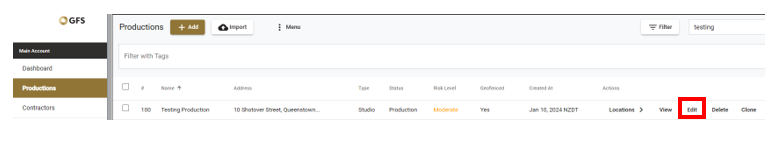
Once you have created your template you are then ready to assign it to a Production/Location. To do this go to your Production Tab and click on Edit of the Production/Location you wish to add the Job Safety Analysis to.
Click on the Job Safety Analysis tab on the right-hand side
Click on +New Job Safety Analysis and select from the drop down menu.
Create New – opens a new blank template
Select from Templates – opens a list of your templates which you can select from either individually or multiple. Then click on select & close
Copy all Templates – copies all created templates to your production/location
The template will be displayed with the Version # once you add it. Click on Edit to assign it to the individual users

All the previous entered information at Account level will be displayed.
- You can also change the Authorizer, Approver & Supervisor from here

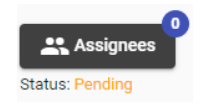
- You can assign the Job Safety Analysis to the people who will be carrying out the task from your User list by clickingon the Assignees tab.
You can also add more Tools, PPE, Work Permits and Manage any relevant files by scrolling to the bottom and clicking on the relevant tab.

How to create your Workflow
To create your workflow click on the Workflow section at the top of the page when editing your Job Safety Analysis.
Click on + New Step

Enter the 1st workflow step description. You can upload files and associate hazards/risks from the production/location hazards only (not account level hazards/risks). Continue to add as many workflow steps as applicable.
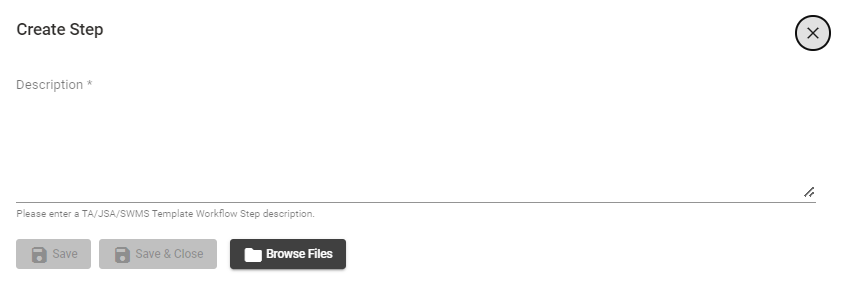
You can also add any relevant files by clicking Browse Files.
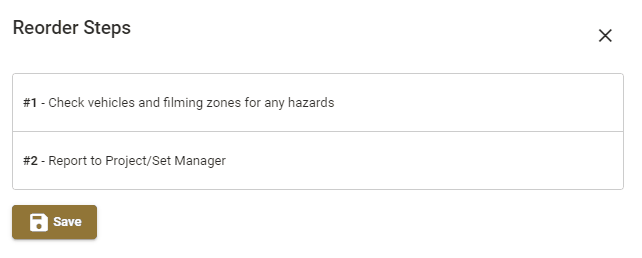
Once you have completed your first step you can continue to create more by clicking New Step. You can also reorder these steps by clicking on the Reorder Steps button.

You can then click and drag the steps around to reorder them in the workflow.
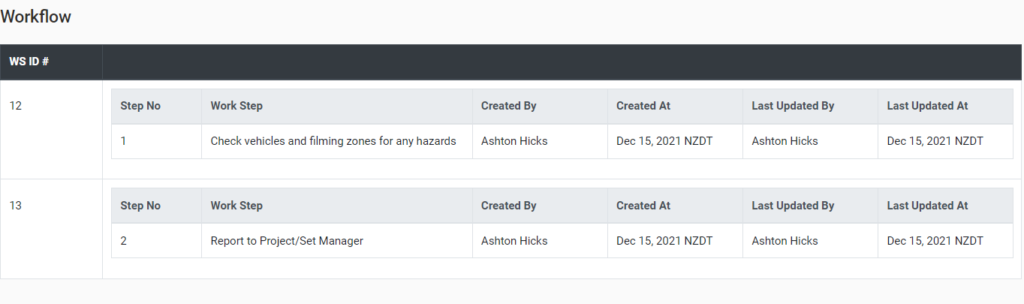
Once you have completed the Workflow and added all relevant steps you can exit and the Workflow will then be visible when you View the Job Safety Analysis in the Templates menu or within the Job Safety Analysis View option in the Production/Location.
How to approve/authorize/acknowledge the Job Safety Analysis if you have been assigned as an authorizer, approver or supervisor
You can now select an Approver, Authorizer and Supervisor by clicking on the applicable tab.

A list of your Employees will be displayed, which you can select from.
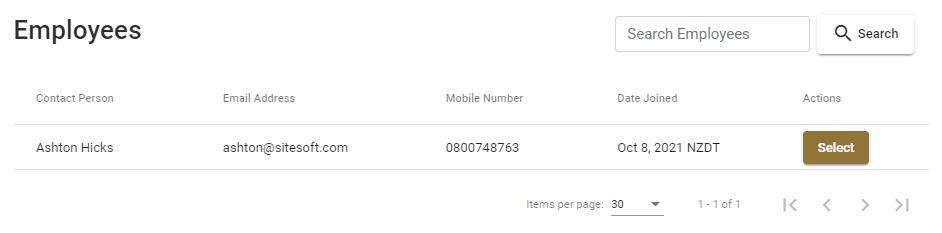
If the person you need to carry this out is not available in this list please see here to learn how to add your Cast/Crew as Employees.
Once the person has been selected they can approve the Job Safety Analysis by going into the relevant production/location and clicking on the relevant Job Safety Analysis. They will see under the Tabs in Green that they are required to approve/authorise/acknowledge. These individual tabs will only show if they are assigned as one of these roles.

Once they have clicked on the relevant Tab it will turn grey to indicate the Job Safety Analysis has been approved/authorized/acknowledged.

You can View, Delete or Export to PDF or CSV by clicking on the below tabs

How to manage Tools
To manage tools click on the Tools tab in the main menu
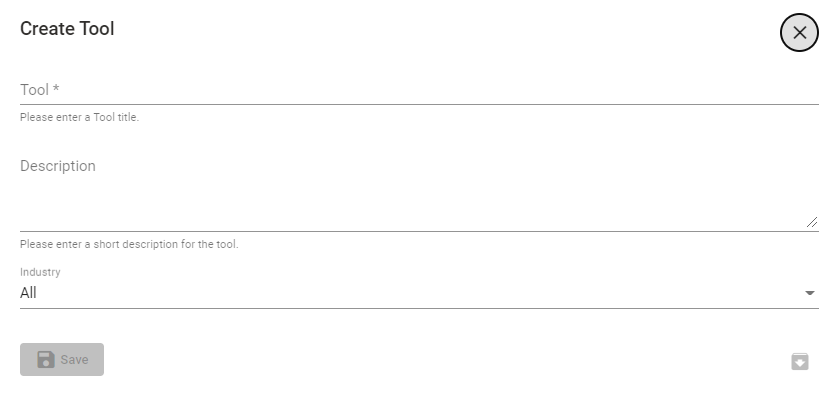
Click on Add Tool to add a Tool to your list of tools

The below dialog box will open. Enter the required data and then click on Save.
Tool – enter the name of the tool.
Description – enter the description of the tool.
Industry – select which industry the tool relates to from the drop down box or leave it as All.
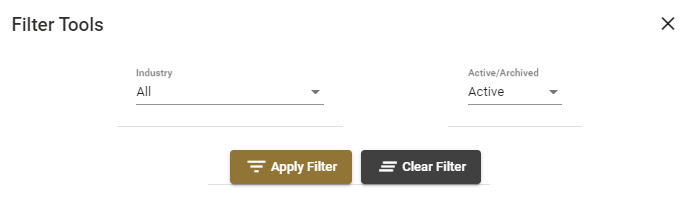
Once your tools have been created you can view, edit or archive them.

Filter them by Industry or Active/Archived
Export them to a CSV file
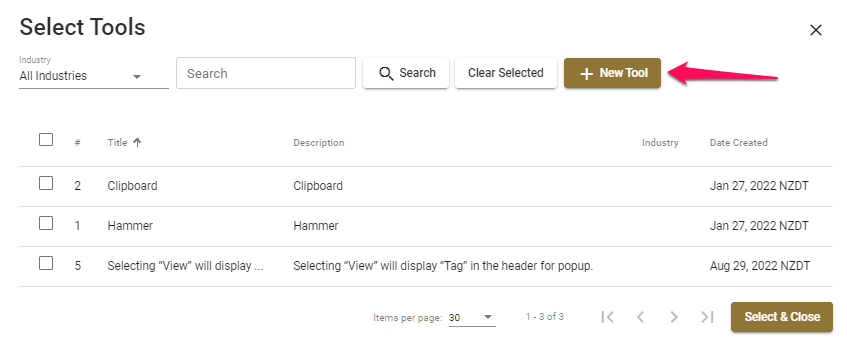
You can select them from the Tools icon for your Job Safety Analysis

You can select individual tools or click on +New Tool to create a new tool.
When are Notifications sent?
Job Safety Analysis notifications are triggered under any of the following conditions:
- When a Job Safety Analysis is added to a production, the Job Safety Analysis supervisor and production managers are notified.
- When a Job Safety Analysis is acknowledged by an assignee, the Job Safety Analysis supervisor and production managers are notified.
- When assignees are added/modified, if they have not acknowledged the Job Safety Analysis, they are notified that they were added to the Job Safety Analysis.
- When assignees add other assignees to the Job Safety Analysis via the SetConnect mobile app, the Job Safety Analysis supervisor is notified.
- When a new Job Safety Analysis version is created, the approver, authoriser, supervisor, production managers and all assignees are notified.
- When a workflow step note is added or updated, the Job Safety Analysis supervisor is notified.
For any SetConnect issues or questions, please contact us at info@set-connect.com