Learn how to manage notification roles and sites and employees for notification roles
When you activate notification roles and have notifications enabled, any associated cast/crew will start receiving those notifications. All notifications that are production/location related will trigger for all productions/locations unless you have specific productions/locations selected in which case, the notifications will only trigger for specific productions/location. When productions/locations are selected, non-production/location related notifications are disabled. To add non-production/location related notifications to notification roles, you can disassociate the productions/locations or create different notification roles and not associate productions/locations with them.
Access Your Notification roles
To access your notification roles click on the cog wheel in the top right hand corner of the Web Portal and select Notification Roles .

This will open the list of notification roles for your account.

Add a New Notification Role
Click on the New Notification Role button above the list.

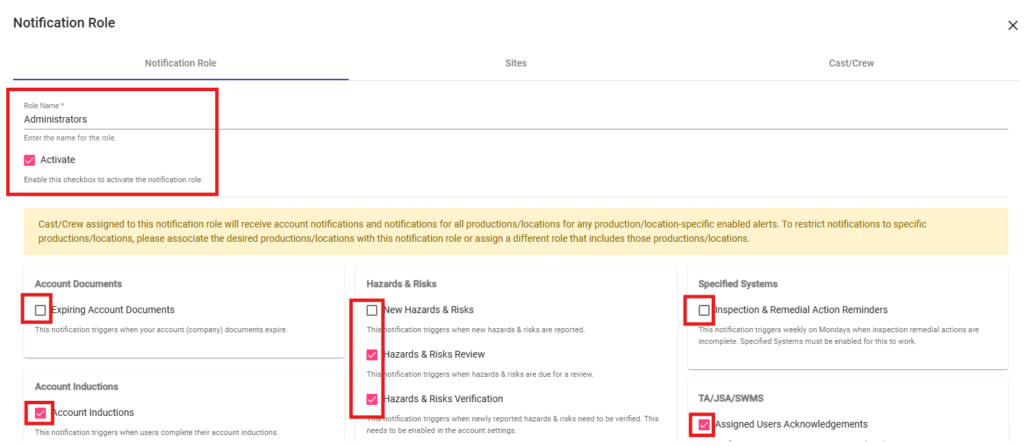
Enter a relevant name for the notification role. Tick the Activate checkbox to enable the notification role (you can skip this step if you want to and first fully configure the notification role before making it active).

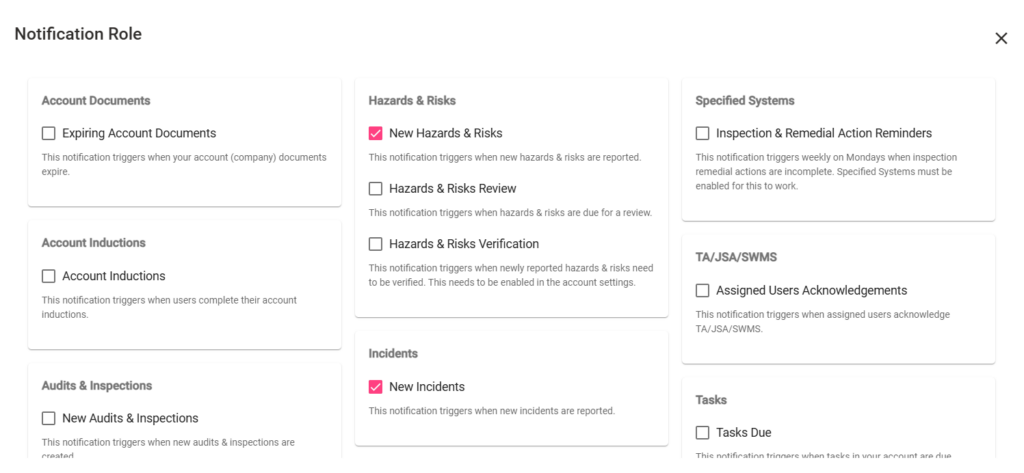
Tick the notification checkboxes you want to enable for this notification role. They are grouped by feature and there can be multiple notifications per feature.

Click on Save to save and continue editing the notification role or Save & Close to save and close the notification role dialog.

Edit an Existing Notification Role
Click on the Edit button to the right of the notification role you want to edit.

The Notification Role dialog box will open. You can change the role name, activate/deactivate the notification role, and select/deselect any of the enabled notifications for this role.

Once you have made your changes click on Update or Update & Close.

Link Productions/Locations with a Notification Role
When productions/locations are selected, non-production/location related notifications are disabled. To add non-production/location related notifications to notification roles, you can disassociate the productions/locations or create different notification roles and not associate productions/locations with them.
To associate the Notification role with a production/location click on the Production/Location tab.

A new dialog box will open. Click on Select Production/Location.

A list of your Productions/Locations will display. Select the relevant production/location by clicking in the boxes to the left of the production/location (pink is selected) then click on Select & Close.

The selected productions/locations will display. You can unlink the production/location by clicking on the Unlink option to the right.

Link All Productions/Locations with a Notification Role
To link ALL sites click on the List Menu button and then click on Link All

A dialog box will then display asking you to confirm your selection. Click on Yes to confirm or No to navigate away.

Unlink All Productions/Locations from a Notification Role
To Unlink ALL productions/locations click on the List Menu button and then click on Unlink All

A dialog box will then display asking you to confirm your selection. Click on Yes to confirm or No to navigate away.

Unlink Selected Productions/Locations from a Notification Role
To Unlink selected productions/locations from a Notification role click in the box to the left of the production/location you want to unlink (pink is selected) and then click on List Menu and Unlink Selected.

A dialog box will then display asking you to confirm your selection. Click on Yes to confirm or No to navigate away.

Linking Cast/Crew with a Notification Role
To associate the Notification role with cast/crew click on the Cast/Crew tab.

A new dialog box will open. Click on Select Cast/Crew.

A list of your cast/crew will display. Select the relevant cast/crew by clicking in the box to the left of each cast/crew member that you want to select (pink is selected) and then click on Select & Close.

Unlinking selected Cast/Crew from a Notification Role
Click on the Cast/Crew tab.

The selected cast/crew will display. You can unlink the cast/crew individually by clicking on the Unlink option to the right of the applicable person’s name.

Or click in the box to the left of each cast/crew you want to unlink (pink is selected) and then click on List Menu and then the Unlink Selected option.

A dialog box will then display asking you to confirm your selection. Click on Yes to confirm or No to navigate away.

For any SetConnect issues or questions please contact us at: support@setconnect.io